EC_2025_Q3_ENLibrary "EC_2025_Q3_EN"
output2025()
Returns the list of events during the period.
Returns: array: (week1,week2, ... week_n)
week_n= ;;; ...
Where: is expressed as date + characteristics: YYYY,MM,DD,hh,mm,ss,x,y,z
x impact in numbers
y event name in numbers
z currency in numbers
name2025()
Returns the list of event names during the period.
Returns: array: (week1,week2, ... week_n)
week_n= ;; ...
Where: is expressed as: index, name
index: related to event name y
name event: event name related to y text
impact2025()
Returns the list of impact names during the period.
Returns: array: (week1,week2, ... week_n)
week_n= ;; ...
Where: is expressed as: index, impact
index: related to impact name x
impact: impact name related to x text
currency2025()
Returns the list of currencies during the period.
Returns: array: (week1,week2, ... week_n)
week_n= ;; ...
Where: is expressed as: index, currency
index: related to currency name z
currency: currency name related to z text
在脚本中搜索"text"

EC_2025_Q2_ENLibrary "EC_2025_Q2_EN"
output2025()
Returns the list of events during the period.
Returns: array: (week1,week2, ... week_n)
week_n= ;;; ...
Where: is expressed as date + characteristics: YYYY,MM,DD,hh,mm,ss,x,y,z
x impact in numbers
y event name in numbers
z currency in numbers
name2025()
Returns the list of event names during the period.
Returns: array: (week1,week2, ... week_n)
week_n= ;; ...
Where: is expressed as: index, name
index: related to event name y
name event: event name related to y text
impact2025()
Returns the list of impact names during the period.
Returns: array: (week1,week2, ... week_n)
week_n= ;; ...
Where: is expressed as: index, impact
index: related to impact name x
impact: impact name related to x text
currency2025()
Returns the list of currencies during the period.
Returns: array: (week1,week2, ... week_n)
week_n= ;; ...
Where: is expressed as: index, currency
index: related to currency name z
currency: currency name related to z text

EC_2025_Q1_ENLibrary "EC_2025_Q1_EN"
output2025()
Returns the list of events during the period.
Returns: array: (week1,week2, ... week_n)
week_n= ;;; ...
Where: is expressed as date + characteristics: YYYY,MM,DD,hh,mm,ss,x,y,z
x impact in numbers
y event name in numbers
z currency in numbers
name2025()
Returns the list of event names during the period.
Returns: array: (week1,week2, ... week_n)
week_n= ;; ...
Where: is expressed as: index, name
index: related to event name y
name event: event name related to y text
impact2025()
Returns the list of impact names during the period.
Returns: array: (week1,week2, ... week_n)
week_n= ;; ...
Where: is expressed as: index, impact
index: related to impact name x
impact: impact name related to x text
currency2025()
Returns the list of currencies during the period.
Returns: array: (week1,week2, ... week_n)
week_n= ;; ...
Where: is expressed as: index, currency
index: related to currency name z
currency: currency name related to z text

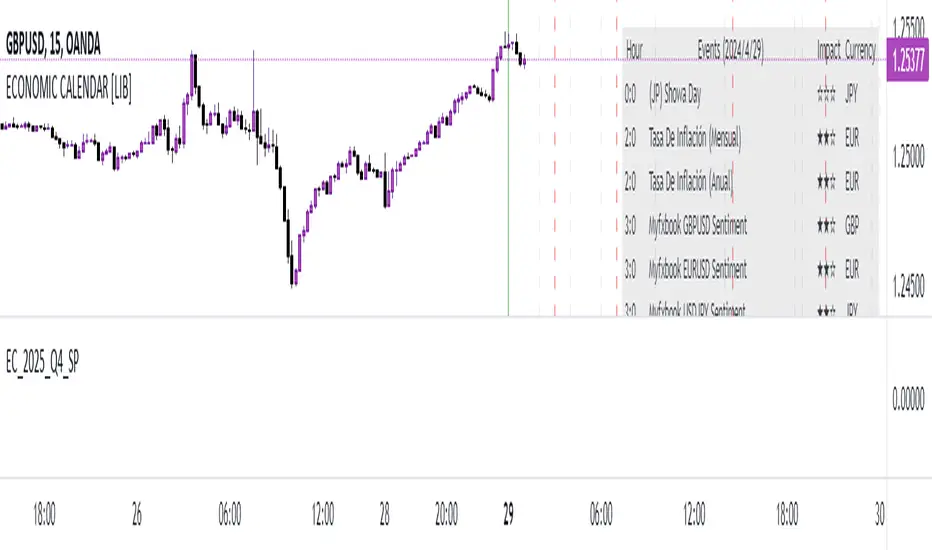
EC_2025_Q4_SPLibrary "EC_2025_Q4_SP"
output2025()
Returns the list of events during the period.
Returns: array: (week1,week2, ... week_n)
week_n= ;;; ...
Where: is expressed as date + characteristics: YYYY,MM,DD,hh,mm,ss,x,y,z
x impact in numbers
y event name in numbers
z currency in numbers
name2025()
Returns the list of event names during the period.
Returns: array: (week1,week2, ... week_n)
week_n= ;; ...
Where: is expressed as: index, name
index: related to event name y
name event: event name related to y text
impact2025()
Returns the list of impact names during the period.
Returns: array: (week1,week2, ... week_n)
week_n= ;; ...
Where: is expressed as: index, impact
index: related to impact name x
impact: impact name related to x text
currency2025()
Returns the list of currencies during the period.
Returns: array: (week1,week2, ... week_n)
week_n= ;; ...
Where: is expressed as: index, currency
index: related to currency name z
currency: currency name related to z text
EC_2025_Q3_SPLibrary "EC_2025_Q3_SP"
output2025()
Returns the list of events during the period.
Returns: array: (week1,week2, ... week_n)
week_n= ;;; ...
Where: is expressed as date + characteristics: YYYY,MM,DD,hh,mm,ss,x,y,z
x impact in numbers
y event name in numbers
z currency in numbers
name2025()
Returns the list of event names during the period.
Returns: array: (week1,week2, ... week_n)
week_n= ;; ...
Where: is expressed as: index, name
index: related to event name y
name event: event name related to y text
impact2025()
Returns the list of impact names during the period.
Returns: array: (week1,week2, ... week_n)
week_n= ;; ...
Where: is expressed as: index, impact
index: related to impact name x
impact: impact name related to x text
currency2025()
Returns the list of currencies during the period.
Returns: array: (week1,week2, ... week_n)
week_n= ;; ...
Where: is expressed as: index, currency
index: related to currency name z
currency: currency name related to z text

EC_2025_Q2_SPLibrary "EC_2025_Q2_SP"
output2025()
Returns the list of events during the period.
Returns: array: (week1,week2, ... week_n)
week_n= ;;; ...
Where: is expressed as date + characteristics: YYYY,MM,DD,hh,mm,ss,x,y,z
x impact in numbers
y event name in numbers
z currency in numbers
name2025()
Returns the list of event names during the period.
Returns: array: (week1,week2, ... week_n)
week_n= ;; ...
Where: is expressed as: index, name
index: related to event name y
name event: event name related to y text
impact2025()
Returns the list of impact names during the period.
Returns: array: (week1,week2, ... week_n)
week_n= ;; ...
Where: is expressed as: index, impact
index: related to impact name x
impact: impact name related to x text
currency2025()
Returns the list of currencies during the period.
Returns: array: (week1,week2, ... week_n)
week_n= ;; ...
Where: is expressed as: index, currency
index: related to currency name z
currency: currency name related to z text

EC_2025_Q1_SPLibrary "EC_2025_Q1_SP"
output2025()
Returns the list of events during the period.
Returns: array: (week1,week2, ... week_n)
week_n= ;;; ...
Where: is expressed as date + characteristics: YYYY,MM,DD,hh,mm,ss,x,y,z
x impact in numbers
y event name in numbers
z currency in numbers
name2025()
Returns the list of event names during the period.
Returns: array: (week1,week2, ... week_n)
week_n= ;; ...
Where: is expressed as: index, name
index: related to event name y
name event: event name related to y text
impact2025()
Returns the list of impact names during the period.
Returns: array: (week1,week2, ... week_n)
week_n= ;; ...
Where: is expressed as: index, impact
index: related to impact name x
impact: impact name related to x text
currency2025()
Returns the list of currencies during the period.
Returns: array: (week1,week2, ... week_n)
week_n= ;; ...
Where: is expressed as: index, currency
index: related to currency name z
currency: currency name related to z text

EC_2024_Q4_SPLibrary "EC_2024_Q4_SP"
output2024()
Returns the list of events during the period.
Returns: array: (week1,week2, ... week_n)
week_n= ;;; ...
Where: is expressed as date + characteristics: YYYY,MM,DD,hh,mm,ss,x,y,z
x impact in numbers
y event name in numbers
z currency in numbers
name2024()
Returns the list of event names during the period.
Returns: array: (week1,week2, ... week_n)
week_n= ;; ...
Where: is expressed as: index, name
index: related to event name y
name event: event name related to y text
impact2024()
Returns the list of impact names during the period.
Returns: array: (week1,week2, ... week_n)
week_n= ;; ...
Where: is expressed as: index, impact
index: related to impact name x
impact: impact name related to x text
currency2024()
Returns the list of currencies during the period.
Returns: array: (week1,week2, ... week_n)
week_n= ;; ...
Where: is expressed as: index, currency
index: related to currency name z
currency: currency name related to z text

EC_2024_Q3_SPLibrary "EC_2024_Q3_SP"
output2024()
Returns the list of events during the period.
Returns: array: (week1,week2, ... week_n)
week_n= ;;; ...
Where: is expressed as date + characteristics: YYYY,MM,DD,hh,mm,ss,x,y,z
x impact in numbers
y event name in numbers
z currency in numbers
name2024()
Returns the list of event names during the period.
Returns: array: (week1,week2, ... week_n)
week_n= ;; ...
Where: is expressed as: index, name
index: related to event name y
name event: event name related to y text
impact2024()
Returns the list of impact names during the period.
Returns: array: (week1,week2, ... week_n)
week_n= ;; ...
Where: is expressed as: index, impact
index: related to impact name x
impact: impact name related to x text
currency2024()
Returns the list of currencies during the period.
Returns: array: (week1,week2, ... week_n)
week_n= ;; ...
Where: is expressed as: index, currency
index: related to currency name z
currency: currency name related to z text

EC_2024_Q4_ENLibrary "EC_2024_Q4_EN"
output2024()
Returns the list of events during the period.
Returns: array: (week1,week2, ... week_n)
week_n= ;;; ...
Where: is expressed as date + characteristics: YYYY,MM,DD,hh,mm,ss,x,y,z
x impact in numbers
y event name in numbers
z currency in numbers
name2024()
Returns the list of event names during the period.
Returns: array: (week1,week2, ... week_n)
week_n= ;; ...
Where: is expressed as: index, name
index: related to event name y
name event: event name related to y text
impact2024()
Returns the list of impact names during the period.
Returns: array: (week1,week2, ... week_n)
week_n= ;; ...
Where: is expressed as: index, impact
index: related to impact name x
impact: impact name related to x text
currency2024()
Returns the list of currencies during the period.
Returns: array: (week1,week2, ... week_n)
week_n= ;; ...
Where: is expressed as: index, currency
index: related to currency name z
currency: currency name related to z text

EC_2024_Q3_ENLibrary "EC_2024_Q3_EN"
output2024()
Returns the list of events during the period.
Returns: array: (week1,week2, ... week_n)
week_n= ;;; ...
Where: is expressed as date + characteristics: YYYY,MM,DD,hh,mm,ss,x,y,z
x impact in numbers
y event name in numbers
z currency in numbers
name2024()
Returns the list of event names during the period.
Returns: array: (week1,week2, ... week_n)
week_n= ;; ...
Where: is expressed as: index, name
index: related to event name y
name event: event name related to y text
impact2024()
Returns the list of impact names during the period.
Returns: array: (week1,week2, ... week_n)
week_n= ;; ...
Where: is expressed as: index, impact
index: related to impact name x
impact: impact name related to x text
currency2024()
Returns the list of currencies during the period.
Returns: array: (week1,week2, ... week_n)
week_n= ;; ...
Where: is expressed as: index, currency
index: related to currency name z
currency: currency name related to z text
EC_2024_Q2_ENLibrary "EC_2024_Q2_EN"
output2024()
Returns the list of events during the period.
Returns: array: (week1,week2, ... week_n)
week_n= ;;; ...
Where: is expressed as date + characteristics: YYYY,MM,DD,hh,mm,ss,x,y,z
x impact in numbers
y event name in numbers
z currency in numbers
name2024()
Returns the list of event names during the period.
Returns: array: (week1,week2, ... week_n)
week_n= ;; ...
Where: is expressed as: index, name
index: related to event name y
name event: event name related to y text
impact2024()
Returns the list of impact names during the period.
Returns: array: (week1,week2, ... week_n)
week_n= ;; ...
Where: is expressed as: index, impact
index: related to impact name x
impact: impact name related to x text
currency2024()
Returns the list of currencies during the period.
Returns: array: (week1,week2, ... week_n)
week_n= ;; ...
Where: is expressed as: index, currency
index: related to currency name z
currency: currency name related to z text

EC_2024_Q2_SPLibrary "EC_2024_Q2_SP"
output2024()
Returns the list of events during the period.
Returns: array: (week1,week2, ... week_n)
week_n= ;;; ...
Where: is expressed as date + characteristics: YYYY,MM,DD,hh,mm,ss,x,y,z
x impact in numbers
y event name in numbers
z currency in numbers
name2024()
Returns the list of event names during the period.
Returns: array: (week1,week2, ... week_n)
week_n= ;; ...
Where: is expressed as: index, name
index: related to event name y
name event: event name related to y text
impact2024()
Returns the list of impact names during the period.
Returns: array: (week1,week2, ... week_n)
week_n= ;; ...
Where: is expressed as: index, impact
index: related to impact name x
impact: impact name related to x text
currency2024()
Returns the list of currencies during the period.
Returns: array: (week1,week2, ... week_n)
week_n= ;; ...
Where: is expressed as: index, currency
index: related to currency name z
currency: currency name related to z text

EC_2024_Q1_SPLibrary "EC_2024_Q1_SP"
output2024()
Returns the list of events during the period.
Returns: array: (week1,week2, ... week_n)
week_n= ;;; ...
Where: is expressed as date + characteristics: YYYY,MM,DD,hh,mm,ss,x,y,z
x impact in numbers
y event name in numbers
z currency in numbers
name2024()
Returns the list of event names during the period.
Returns: array: (week1,week2, ... week_n)
week_n= ;; ...
Where: is expressed as: index, name
index: related to event name y
name event: event name related to y text
impact2024()
Returns the list of impact names during the period.
Returns: array: (week1,week2, ... week_n)
week_n= ;; ...
Where: is expressed as: index, impact
index: related to impact name x
impact: impact name related to x text
currency2024()
Returns the list of currencies during the period.
Returns: array: (week1,week2, ... week_n)
week_n= ;; ...
Where: is expressed as: index, currency
index: related to currency name z
currency: currency name related to z text

EC_2024_Q1_ENLibrary "EC_2024_Q1_EN"
output2024()
Returns the list of events during the period.
Returns: array: (week1,week2, ... week_n)
week_n= ;;; ...
Where: is expressed as date + characteristics: YYYY,MM,DD,hh,mm,ss,x,y,z
x impact in numbers
y event name in numbers
z currency in numbers
name2024()
Returns the list of event names during the period.
Returns: array: (week1,week2, ... week_n)
week_n= ;; ...
Where: is expressed as: index, name
index: related to event name y
name event: event name related to y text
impact2024()
Returns the list of impact names during the period.
Returns: array: (week1,week2, ... week_n)
week_n= ;; ...
Where: is expressed as: index, impact
index: related to impact name x
impact: impact name related to x text
currency2024()
Returns the list of currencies during the period.
Returns: array: (week1,week2, ... week_n)
week_n= ;; ...
Where: is expressed as: index, currency
index: related to currency name z
currency: currency name related to z text

EC_2023_Q4_SPLibrary "EC_2023_Q4_SP"
output2023()
Returns the list of events during the period.
Returns: array: (week1,week2, ... week_n)
week_n= ;;; ...
Where: is expressed as date + characteristics: YYYY,MM,DD,hh,mm,ss,x,y,z
x impact in numbers
y event name in numbers
z currency in numbers
name2023()
Returns the list of event names during the period.
Returns: array: (week1,week2, ... week_n)
week_n= ;; ...
Where: is expressed as: index, name
index: related to event name y
name event: event name related to y text
impact2023()
Returns the list of impact names during the period.
Returns: array: (week1,week2, ... week_n)
week_n= ;; ...
Where: is expressed as: index, impact
index: related to impact name x
impact: impact name related to x text
currency2023()
Returns the list of currencies during the period.
Returns: array: (week1,week2, ... week_n)
week_n= ;; ...
Where: is expressed as: index, currency
index: related to currency name z
currency: currency name related to z text

EC_2023_Q3_SPLibrary "EC_2023_Q3_SP"
output2023()
Returns the list of events during the period.
Returns: array: (week1,week2, ... week_n)
week_n= ;;; ...
Where: is expressed as date + characteristics: YYYY,MM,DD,hh,mm,ss,x,y,z
x impact in numbers
y event name in numbers
z currency in numbers
name2023()
Returns the list of event names during the period.
Returns: array: (week1,week2, ... week_n)
week_n= ;; ...
Where: is expressed as: index, name
index: related to event name y
name event: event name related to y text
impact2023()
Returns the list of impact names during the period.
Returns: array: (week1,week2, ... week_n)
week_n= ;; ...
Where: is expressed as: index, impact
index: related to impact name x
impact: impact name related to x text
currency2023()
Returns the list of currencies during the period.
Returns: array: (week1,week2, ... week_n)
week_n= ;; ...
Where: is expressed as: index, currency
index: related to currency name z
currency: currency name related to z text

EC_2023_Q2_SPLibrary "EC_2023_Q2_SP"
output2023()
Returns the list of events during the period.
Returns: array: (week1,week2, ... week_n)
week_n= ;;; ...
Where: is expressed as date + characteristics: YYYY,MM,DD,hh,mm,ss,x,y,z
x impact in numbers
y event name in numbers
z currency in numbers
name2023()
Returns the list of event names during the period.
Returns: array: (week1,week2, ... week_n)
week_n= ;; ...
Where: is expressed as: index, name
index: related to event name y
name event: event name related to y text
impact2023()
Returns the list of impact names during the period.
Returns: array: (week1,week2, ... week_n)
week_n= ;; ...
Where: is expressed as: index, impact
index: related to impact name x
impact: impact name related to x text
currency2023()
Returns the list of currencies during the period.
Returns: array: (week1,week2, ... week_n)
week_n= ;; ...
Where: is expressed as: index, currency
index: related to currency name z
currency: currency name related to z text

EC_2023_Q1_SPLibrary "EC_2023_Q1_SP"
output2023()
Returns the list of events during the period.
Returns: array: (week1,week2, ... week_n)
week_n= ;;; ...
Where: is expressed as date + characteristics: YYYY,MM,DD,hh,mm,ss,x,y,z
x impact in numbers
y event name in numbers
z currency in numbers
name2023()
Returns the list of event names during the period.
Returns: array: (week1,week2, ... week_n)
week_n= ;; ...
Where: is expressed as: index, name
index: related to event name y
name event: event name related to y text
impact2023()
Returns the list of impact names during the period.
Returns: array: (week1,week2, ... week_n)
week_n= ;; ...
Where: is expressed as: index, impact
index: related to impact name x
impact: impact name related to x text
currency2023()
Returns the list of currencies during the period.
Returns: array: (week1,week2, ... week_n)
week_n= ;; ...
Where: is expressed as: index, currency
index: related to currency name z
currency: currency name related to z text

EC_2023_Q4_ENLibrary "EC_2023_Q4_EN"
output2023()
Returns the list of events during the period.
Returns: array: (week1,week2, ... week_n)
week_n= ;;; ...
Where: is expressed as date + characteristics: YYYY,MM,DD,hh,mm,ss,x,y,z
x impact in numbers
y event name in numbers
z currency in numbers
name2023()
Returns the list of event names during the period.
Returns: array: (week1,week2, ... week_n)
week_n= ;; ...
Where: is expressed as: index, name
index: related to event name y
name event: event name related to y text
impact2023()
Returns the list of impact names during the period.
Returns: array: (week1,week2, ... week_n)
week_n= ;; ...
Where: is expressed as: index, impact
index: related to impact name x
impact: impact name related to x text
currency2023()
Returns the list of currencies during the period.
Returns: array: (week1,week2, ... week_n)
week_n= ;; ...
Where: is expressed as: index, currency
index: related to currency name z
currency: currency name related to z text

EC_2023_Q3_ENLibrary "EC_2023_Q3_EN"
output2023()
Returns the list of events during the period.
Returns: array: (week1,week2, ... week_n)
week_n= ;;; ...
Where: is expressed as date + characteristics: YYYY,MM,DD,hh,mm,ss,x,y,z
x impact in numbers
y event name in numbers
z currency in numbers
name2023()
Returns the list of event names during the period.
Returns: array: (week1,week2, ... week_n)
week_n= ;; ...
Where: is expressed as: index, name
index: related to event name y
name event: event name related to y text
impact2023()
Returns the list of impact names during the period.
Returns: array: (week1,week2, ... week_n)
week_n= ;; ...
Where: is expressed as: index, impact
index: related to impact name x
impact: impact name related to x text
currency2023()
Returns the list of currencies during the period.
Returns: array: (week1,week2, ... week_n)
week_n= ;; ...
Where: is expressed as: index, currency
index: related to currency name z
currency: currency name related to z text

EC_2023_Q2_ENLibrary "EC_2023_Q2_EN"
output2023()
Returns the list of events during the period.
Returns: array: (week1,week2, ... week_n)
week_n= ;;; ...
Where: is expressed as date + characteristics: YYYY,MM,DD,hh,mm,ss,x,y,z
x impact in numbers
y event name in numbers
z currency in numbers
name2023()
Returns the list of event names during the period.
Returns: array: (week1,week2, ... week_n)
week_n= ;; ...
Where: is expressed as: index, name
index: related to event name y
name event: event name related to y text
impact2023()
Returns the list of impact names during the period.
Returns: array: (week1,week2, ... week_n)
week_n= ;; ...
Where: is expressed as: index, impact
index: related to impact name x
impact: impact name related to x text
currency2023()
Returns the list of currencies during the period.
Returns: array: (week1,week2, ... week_n)
week_n= ;; ...
Where: is expressed as: index, currency
index: related to currency name z
currency: currency name related to z text
EC_2023_Q1_ENLibrary "EC_2023_Q1_EN"
output2023()
Returns the list of events during the period.
Returns: array: (week1,week2, ... week_n)
week_n= ;;; ...
Where: is expressed as date + characteristics: YYYY,MM,DD,hh,mm,ss,x,y,z
x impact in numbers
y event name in numbers
z currency in numbers
name2023()
Returns the list of event names during the period.
Returns: array: (week1,week2, ... week_n)
week_n= ;; ...
Where: is expressed as: index, name
index: related to event name y
name event: event name related to y text
impact2023()
Returns the list of impact names during the period.
Returns: array: (week1,week2, ... week_n)
week_n= ;; ...
Where: is expressed as: index, impact
index: related to impact name x
impact: impact name related to x text
currency2023()
Returns the list of currencies during the period.
Returns: array: (week1,week2, ... week_n)
week_n= ;; ...
Where: is expressed as: index, currency
index: related to currency name z
currency: currency name related to z text
